Tuesday, March 11, 2014

Procrastination!

Where has the time gone! It seems my intentions are good but my effort lacking. I will continue to try to do a better job posting! Spring is on the way, I think. Today we are had a high of 83 degrees and lots of sunshine, yesterday 81 degrees. I need to work inside the house as much as I need to work outside! Choices, choices! And I have three baskets that need to be made: one for a wedding gift, one for a raffle donation and one for barter! Best get started....and soon!

A couple of weeks ago we had an ice storm here in the low country of SC. Not too bad in our community, but 10 miles north in town, the damage was worse and it got worse the further north you traveled. Lots of broken pines, oaks of all sorts, downed power lines, some houses damaged, etc. We were out of electricity and water only about 35 hours so we didn't have it too bad. Others were out over a week.

Saturday, August 31, 2013

August ends and September begins! Bring on the fall and those cooler temperatures!! And this time of the year, I catch myself looking for long leaf pine trees and their browning needles. I nearly stopped on the side of the road, in the middle of nowhere, yesterday to gather a few needles. But it was not the wisest thing to do; we do have rattlesnakes here and they love dense vegetation, like you find under young pine trees..... Always err on the side of caution!

I recently finished a commissioned basket for some friends and was pleased with the way the basket unfolded. I used some dyed needles, yellow and pale blue green, to blend with the naturally brown needles. The effect was very attractive and the friends quite pleased with their basket. The center of the basket was a sliced hickory nut but the shape triangular instead of the more typical round or oval. Adding in some halved nut slices changed the angles in the developing basket and made the overall shape more triangular. I used upholstery thread and artificial sinew for binders and kept the stitches fairly simple. What do you think?

With dyed needles, the colors stay, of course. But I recently saw on an Etsy site a basket maker that claimed by using green needles, the green color would remain. This is not true. Green needles do stay green for a while but even exposure to indirect light will cause their green to fade in time and turn the needles, eventually, brown. The only way to have green colored needles in a basket is to dye the needles.

Enjoy your weekend! And make a basket! :-)


Friday, August 9, 2013

Time Flies!!

Where did all that time go?? From February to August is a big chunk of lost time. Guess it wasn't so much "lost" but busy! Aren't we all? So to begin on an early August morning, looks like it will be a good day. Hot and humid in the south but a good day, none-the-less!

I have noticed the browning of the long leaf pine needles on some of the more mature trees. I keep eyeing a grouping of needles in a yard that I pass once a week and just want to stop, sit down on the ground, and gather needles! It is such a nice tree with low level limbs! And beautiful, long pine needles begging to be gathered! I may have to go knock on the door to beg permission if this feeling persists much longer!

 It is always good to try something new and we all love a challenge every now and then. I am a member of an online basketry class. The teacher is wonderful and the tutorials challenging! It is always fun to see the finished product, not only your own but other basket makers' designs. Such creative people in our group! This little basket is a product of one of the many lessons. The weave design around the sides brings out the basket by adding color. And the alternating stitch on each row adds interest. As in
any instructions presented in a class, once you grasp the concept of the lesson, you may be able to "modify and adjust" that lesson to better suit your style or techniques while still meeting the lesson's goal. This was true for me in this lesson. This basket was a tool by which I learned a new technique and then modified that technique to best work for me. There are definitely some tricks in making the decorative weave pattern seen along the sides of the basket. Isn't that what life is all about: live and learn, make it work for you? The handle is made of braided pine needles and attached to the sides of the basket securely with stitches decorated by a bead.

Many people don't realize the time involved in a basket. I find working with pine needles, needle and binder to be much slower than the technique used to put the Charleston Sweetgrass baskets together. And depending on the decorative stitches used, the time may increase significantly! But none of this is important if you are after a special look for your basket. The pleasure is in the doing, not the time you spent....

Enjoy your last few days of summer! School will be starting soon which seems to bring on the fall. But now that I am retired, everyday is a holiday for me!

Have a great day!

Monday, February 25, 2013

Brrr! It's cold today in comparison to the temps we have had this winter. So what better, productive work to do but coil! I recently finished another antler basket. Something different that I wanted to try. I was pleased with the results but see improvements if I should do another basket like this in the future. Its new owner is pleased and that makes me happy! Antler baskets are always different since no two antlers are alike....


And then I made a simple basket with teneriffe center. Teneriffe is a lace-weaving technique that has been adapted for basket making. The design is made around the "spokes" at the center of a form and then incorporated into the basket. I used artificial sinew to surround the teneriffe ring and then to make the design. I was pleased with the results and will make this basket a gift for my mom. Simple baskets are so easy to make with relatively little thought but I always love them for their simplicity.

Have a great day!

Wednesday, January 16, 2013

A New Year

It is January and a new year has begun. I hope it will be a safe, prosperous and healthy year for all!


I am enjoying the spring-time weather we are having although I know it won't last. I do like to wrap up in layers or burrow under quilts when the temps are much cooler. Of course it doesn't get that cold in the south for very long!

While enjoying the house open to the breezes in this warm weather, I bundled pine needles from three boxes I had tucked aside and I had collected a good while back. I don't wash my needles unless they look particularly dirty. I assume nature has already taken care of that. I have never had problems with insects but have some needles with spots due to the work of fungus that had begun to break the needles down while on the ground. Keeping the needles dry will prevent further fungal growth. A basket made with these needles will hold up fine and the spots add some character to the needles, too! I do break off or dispose of needles that are too far gone or too fragile due to damage.

I often dry my needles in the attic in the summertime. They dry very fast and thoroughly there! The sun will do a good job, too, with the needles spread out on a sheet in the yard. The sun helps turn green needles brown. Never bundle fresh (green) needles because the moisture in them will cause the needles to mildew. Always keep needles in a dry place ... cardboard box, plastic sweater box, etc. And dried green needles will eventually turn brown when exposed to sunlight, either direct or indirect. So when a basket has variations of color due to both brown and green needles, eventually the greens will fade to browns. The only way to get the greens to stay or any color to be added at all is to dye the needles before coiling.

I am making a new basket now for an auction. I do this every year for several community groups. I am finding my creativity comes and goes. I just trust that the basket will take on its own character and my hands will follow its lead. That's part of the fascination of basket making!


Saturday, December 15, 2012

 
Hello!! Welcome to the Pine and Simple Blog. I am new to the workings of the blog itself so please bear with me. I hope you enjoy some pictures of my baskets. What I intend to accomplish here is to share my baskets with you and expose you to pine needle basket making ... a truly beautiful art form!


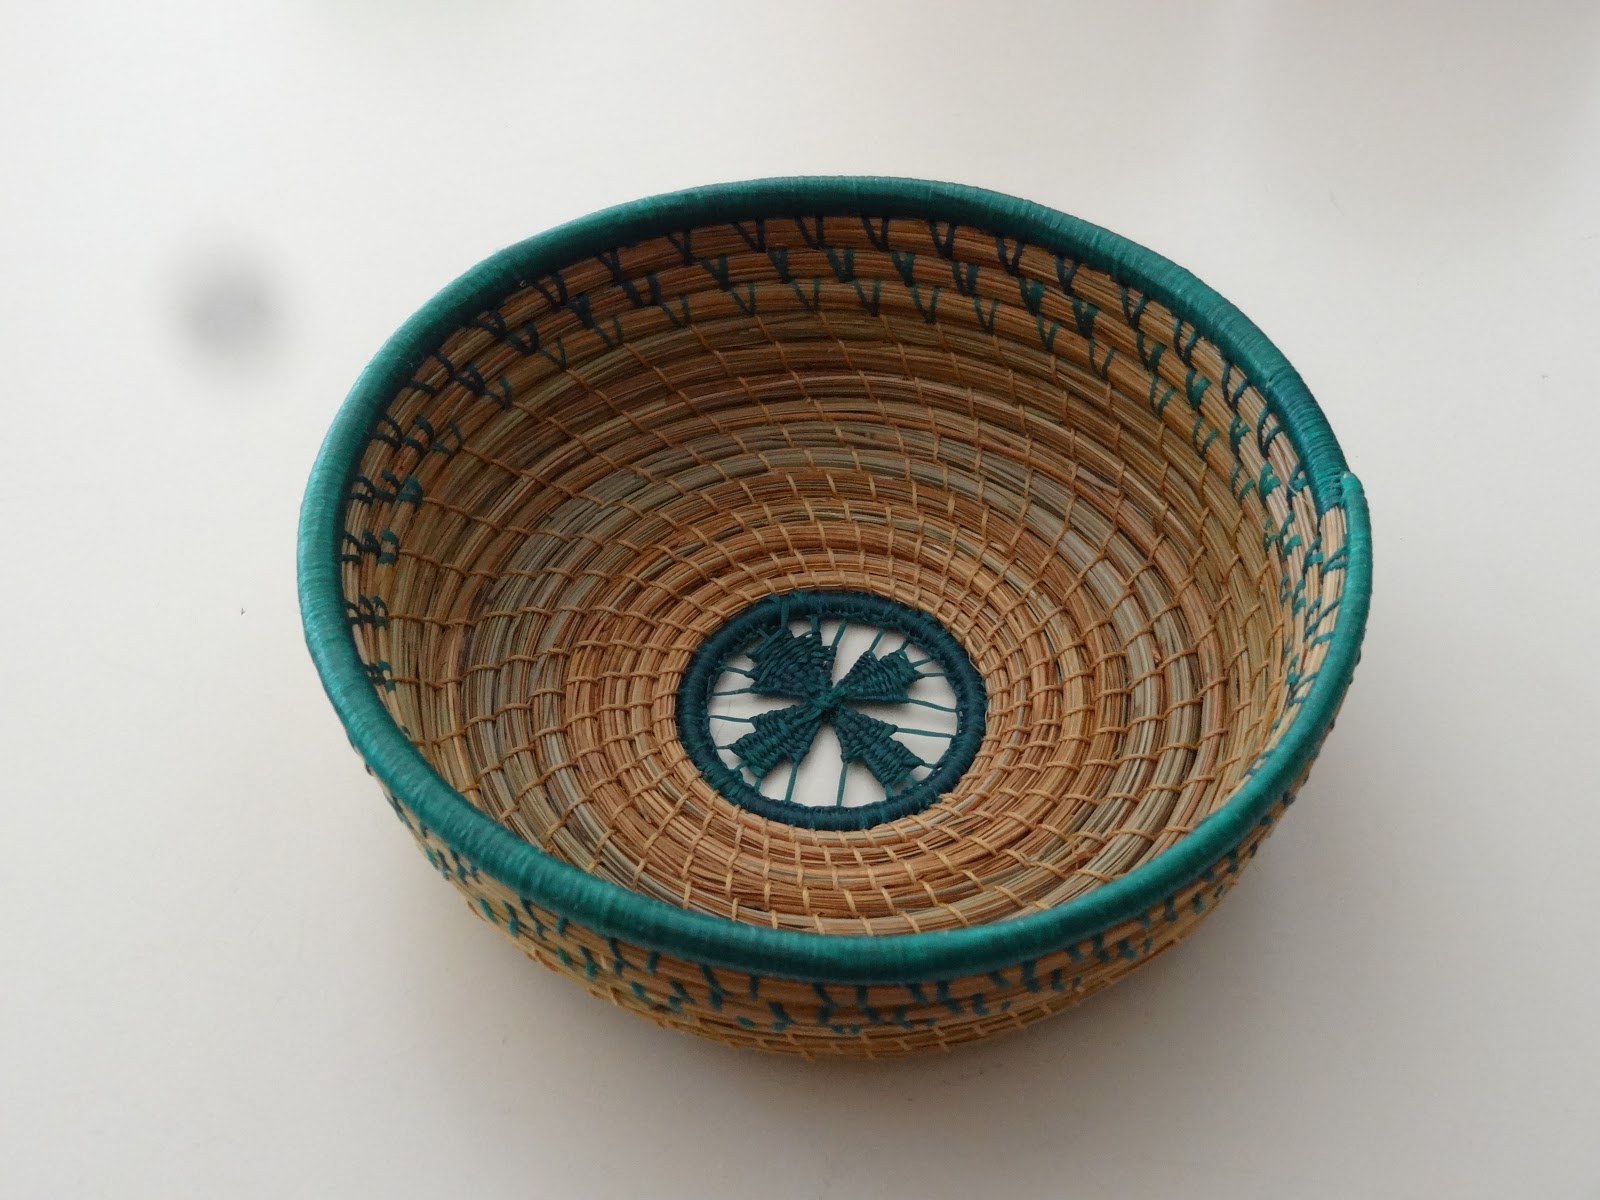
Simple Basket with Dark Blue Dyed Band
Brief History: Pine needle basket making is a fairly old skill, maybe as far back as 9000 years and before pottery making was developed. In this country, the Cherokee, Seminoles and Coushatta tribes of Louisiana were know to have made pine needle baskets. Instead of a needle like I use, they used a sharp bone or shell to sew the coils together. They would also mix various grasses in with the needles to make very tightly woven, sometimes water-proof baskets or containers.
 
During the Civil War (1861-1865), pine needle coiling appeared in south Georgia when a woman made a hat for her father since they hadn't the money to buy one. In the late 19th century, coiling became a popular Victorian craft enjoyed by the ladies.
 
Stitching Materials: In the distant past, various grasses, plant fiber strips and sinew were used to bind the coils together. Today's coilers use nylon upholstery, waxed linen or embroidery threads, yarn, raffia and artificial sinew. A coiler is limited only by his imagination!
 
The Coils: Almost any type of pine needles can be used unless the needles are really short. Ideally coilers use the needles of the southern long-leaf pine, varying in size from 14-18 inches. Shorter needles can be used but the coil must be "fed" more often.
 
Types of Stitches: There are many stitching types seen in today's baskets: plain, "v" stitch, fern, wheat, Indian wrap and back stitch to name a few. Again, a coiler is limited only by his imagination. Many beautiful stitches originate by accident.
 
 
I love the creativity, simplicity and beauty found in Nature. The look of leaves blowing in the wind, the colors of fall, sunlight reflecting from the surface of a river ... all contain unique examples of raw beauty, beauty at its best.
 
In making my pine needle baskets, I try to capture a little of that beauty and simplicity. I use needles from the southern long-leaf pine. I gather them by hand and dry them for later use. I sometimes dye my needles to add elements of color to my baskets. Though some of my baskets are made with light green pine needles, having harvested the needles straight from the tree and dried them, the needles, in time and with exposure to sunlight, will turn a rich warm brown color.
 
Some baskets, I finish with a solution of 1/2 shellac and 1/2 denatured alcohol; this gives the basket a slight sheen and imparts a little more rigidity to the coils. Other baskets, I leave completely natural with no finish added.
 
Baskets can be used in many ways though I would not recommend putting food or liquids directly onto the basket. I typically put a napkin or cloth between my basket and solid food to protect the basket from oils or stains left by the food and protect the food from the finish.

I have been using antlers in baskets for a few years now. Each antler basket I make is unique. The antler tends to dictate the shape of the basket which I find quite interesting. I live in the Low Country of S.C. where many large working plantations are still found. My idea in making the antler baskets was to incorporate a way to get antlers in the home without their being attached to a head on the wall!
 
Feel free to ask questions. Coiling is an art to be shared.